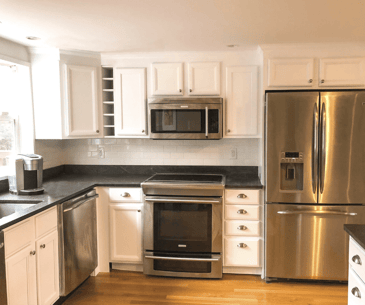
Solving Problems - Tom Curren Companies Making Homes More Beautiful Since 1986 Fri, 18 Nov 2022 14:53:19 +0000 en-US hourly 1 https://wordpress.org/?v=6.7.2 https://www.tomcurrencompanies.com/wp-content/uploads/2021/12/cropped-Square-TCC-Logo-32x32.png Solving Problems - Tom Curren Companies 32 32 Frozen Pipes https://www.tomcurrencompanies.com/blog/frozen-pipes/ Thu, 08 Nov 2018 20:43:08 +0000 https://www.tomcurrencompanies.com/?p=2457      During winter months when temperatures drop, bursting water pipes are a major concern for home owners. Water pipes rupture because water expands as it […]

The post Frozen Pipes appeared first on Tom Curren Companies.

]]>
     During winter months when temperatures drop, bursting water pipes are a major concern for home owners. Water pipes rupture because water expands as it freezes. Frozen water molecules take up more space than liquid water molecules and cause a buildup in pressure inside the pipe. When the pressure gets to be too great for the pipe to contain, it bursts. The flooding and water damage that result from a ruptured pipe can be quite costly. As with everything in life, it’s best to be smart and get ahead of any potential problems. The nightmare of bursting water pipes can be largely avoided with a few key preventative actions.

     Firstly, find the potential troublemakers. Certain pipes are more susceptible to freezing than others, depending on their location in the home. The pipes that are most likely to freeze are located in exterior walls that have little or no insulation; exposed pipes in areas of the house that aren’t heated—basements, crawl spaces, attics, garages, kitchen cabinets; and any plumbing around the exterior of the house. Be extra vigilant with these areas. Water-damage, mold, and moisture build-up might be indications that certain pipes have frozen previously. This can be due to inadequate or improperly installed insulation. In these cases, it might be worth it to open the wall and better insulate the pipes.

     When cold temperatures become extreme, open kitchen and bathroom cabinets enabling warmer air to circulate around the plumbing. Conversely, garage doors should remain closed if there are water supply lines in the garage, to prevent cold air from reaching them. Let water drip from faucets served by exposed pipes to help prevent them from freezing. Also, regulating the thermostat to the same temperature both during the day and night can keep pipes from freezing.

     Don’t forget to disconnect, drain and store your garden hose before temperatures drop. A frozen garden hose can actually cause an interior pipe to burst. As water in the hose freezes it increases pressure throughout the entire plumbing system. Also, if your spigots are not frost proof, close the interior shut-off valve connected to the faucet, open and drain the spigot, and install a faucet insulator. Faucet insulators are inexpensive and completely worth it. Any type of insulation is better than nothing. Even newspaper can protect and insulate pipes to a certain extent.

     Worst case scenario, your pipe has burst. What do you do now? First things first, act fast to minimize the damage. Stop the water. Every home owner should know where the stop tap is on the water main. It is usually under the kitchen sink, or where the main service pipe connects to the house. After the water is off, drain the pipes by running the cold water from the faucets and flushing the toilets. Next, turn off the hot water heater, then proceed to run the hot water from the faucets until there is no more running tap water. Next, locate the broken pipe and inspect the damage. Some people are handier than others and may be able to repair a burst non-main pipe on their own. However, it’s not a bad idea to call in a plumbing company. After the plumber pays a visit, call a professional remediation company. Unfortunately, cleaning your home after a pipe has burst isn’t as simple as using a towel. Remediation companies specialize in removing the wet affected areas, and drying out the space to prevent harmful mold and mildew from forming. They extract excess water with high-powered pumps and wet/dry vacuums. Then, they set to work on the structural drying process. It can be difficult to know which areas need to be dried if you’re not an expert. Water can settle into every nook and cranny. Water damage restoration can involve cutting open and ripping out walls and ceilings. After the remediation work you’ll want to have the walls and ceilings repaired, painted etc- which our company can assist with!

The post Frozen Pipes appeared first on Tom Curren Companies.

]]>
What Is Surfactant Leaching: Causes & Fixes https://www.tomcurrencompanies.com/blog/surfactant-leaching/ Thu, 08 Nov 2018 16:29:56 +0000 https://www.tomcurrencompanies.com/?p=2438 What causes stains on my bathroom wall? Likelier than not, the stains and discoloration on your bathroom wall are the result of something called surfactant leaching. […]

The post What Is Surfactant Leaching: Causes & Fixes appeared first on Tom Curren Companies.

]]>
What causes stains on my bathroom wall?

Likelier than not, the stains and discoloration on your bathroom wall are the result of something called surfactant leaching. You might know surfactant leaching by one of its many colorful alternate names: exudation (a botanical term that refers to a substance secreted by plants), streaking, or weeping. No matter what you call it, it’s unsightly. Generally, it manifests as ectoplasmic, ugly brown spots on the bathroom wall, or else as glossiness, oiliness, soapiness, stickiness, or drip-like stains.

Why does surfactant leaching happen?

Well, because latex paints contain something called surfactants—water-soluble ingredients that reduce surface tension while imparting color and stability to your paint. To put a finer point on the matter, let’s take a short, chemistry-related detour: the moisture in your bathroom concentrates and draws out the water-soluble surfactants from inside the paint; when that happens and the moisture evaporates, deposits from the surfactants float to the surface of the paint, creating the discoloration you’re seeing on your walls. Also: surfactant leaching tends to affect accent colors and dark colors more dramatically than white-painted walls. That’s because there are even more surfactants when you add a colorant to paint, thus creating more deposits when overexposed to moisture and humidity.

Is surfactant leaching a paint avoidable?

Just to be clear, though: surfactant leaching is not a paint defect. In fact, it’s a practically unavoidable byproduct of using paint, particularly if your bathroom lacks exceptional ventilation. Leaching doesn’t generally affect the integrity or durability of a paint job, but it’s definitely unattractive and you’ll probably want to get rid of it—but how?

How do you get rid of surfactant leaching?

Well, you’ll be happy to learn it isn’t too tough a job. It’s as simple as washing the area with soap and water and then rising it off. Be aware, though, that the film discoloration may come back before the surfactant is totally removed. What’s more, leaching occurs over time, so you’ll need to maintain your walls by wiping stains away as they come to your attention. If, however, your goal is to repaint entirely, make sure to let any coat of paint dry completely before using the shower, and remove any and all stains before you start. If surfactant leaching seriously gets under your skin, consider investing in a ventilation system to keep the room drier and less susceptible to weeping. Otherwise, rest assured that those unlovely stains can be removed, and—with vigilance and regular clean-ups—your walls can look practically as good as new.

The post What Is Surfactant Leaching: Causes & Fixes appeared first on Tom Curren Companies.

]]>
Why Tom Curren Companies Won’t Power Wash Your Home https://www.tomcurrencompanies.com/blog/power-washing-your-home/ Thu, 08 Nov 2018 16:03:51 +0000 https://www.tomcurrencompanies.com/?p=2411      Power washing introduces one of the biggest pain points for customers to consider when trying to make a change to their home: the cost. […]

The post Why Tom Curren Companies Won’t Power Wash Your Home appeared first on Tom Curren Companies.

]]>
     Power washing introduces one of the biggest pain points for customers to consider when trying to make a change to their home: the cost. While some companies may sell you a seemingly reasonable price, the potential for damage during the process and its associated price tags are often hidden from the consumer at first glance. Directing water at such an intense speed and pressure at the outside of your home may not only reach the outside, but also spread to create damage within the home’s walls.

     For homes with wooden frames or any wooden exterior features, such as shingles or clapboards, water can sometimes gain access inside the home by making its way underneath the siding and moving into the walls, insulation, and more. This unwanted water can then become trapped inside of these narrow, unseen spaces around your home- causing damage from within. Homes built with brick and mortar can also fall victim to similar water-caused deterioration, as the excessive moisture can make the home’s structure soften. Areas with loose paint are especially vulnerable to harm, as harsh power washing can remove these sections of paint and allow the water to make contact with the wood underneath.

     These potential hazards often come with hefty consequences. According to a study from HomeAdvisor, trim repair costs for your home can cost anywhere from $100 to $1,684 (depending on how extensive the damage may be) on top of what you have already paid for your power wash. In addition, DIY Network warns that clapboard siding ranges from $5 to $8 per square foot, with the average two-story house spending between $14,000 and $23,000 to install an entire exterior.

     Power washing your home can also cause loose lead paint chips to be embedded into your lawn. For many older homes, lead paint is an unfortunate reality when attempting to make any changes, both on the interior and exterior of the residence. Removing any paint from the home with high-pressure water can lead to these dangerous chips being scattered around your home, near children and pets alike. Tom Curren Companies makes sure that all of our crews are EPA Certified, so that they know how to safely service, remove, and/or dispose of any lead paint in your home before even entering it.

     Though at first power washing can seem like an easy option to brighten the exterior of your home, this “wash” is only creating a false sense of clean for the consumer. Without hand-scrubbing the surface as our crews do, mold and mildew are often left behind. Meaning that if you paint over this newly “clean” home, you are giving mold and mildew the opportunity to grow through your fresh coat of paint- making you strip the paint down to the bare wood in order to remove the issue that was there all along. This often leaves customers with additional, unwanted costs thanks to poor prep work on the vendor’s part. At Tom Curren Companies, our crews will scrub your home by hand with bleach and Jomax, and we will be prepared for whatever we find across the exterior of your home.

The post Why Tom Curren Companies Won’t Power Wash Your Home appeared first on Tom Curren Companies.

]]>
Carpentry Inspections: An Investment Instead of an Estimate https://www.tomcurrencompanies.com/blog/carpentry-inspections/ Wed, 07 Nov 2018 21:03:41 +0000 https://www.tomcurrencompanies.com/?p=2407      At Tom Curren Companies, we believe customers benefit from the knowledge that carpentry inspections provide through additional information that simple estimates cannot uncover. These […]

The post Carpentry Inspections: An Investment Instead of an Estimate appeared first on Tom Curren Companies.

]]>
     At Tom Curren Companies, we believe customers benefit from the knowledge that carpentry inspections provide through additional information that simple estimates cannot uncover. These carpentry inspections do carry a fee, as they not only tell the customer what the cost of the work is but also include our employees performing a comprehensive service in the process.

     Estimators are generally only able to provide a price based on what they can see from the surface of the job. The estimates generated from these appointments are not based on any in-depth studying, such as climbing on ladders to get a better look or even inspecting and probing the wood itself. These and other processes performed during our inspections are what we use as a basis for the flat fee that our carpentry inspections require. So while a face value estimate may be applicable for many paint and remodeling jobs, the underlying issues often associated with carpentry projects can greatly benefit from this closer look at your home.

     When clients book a carpentry inspection with Tom Curren Companies, they are able to meet with a carpenter that has their CLS (Construction Supervisor License) to perform their inspection. This carpenter will look beyond the specific problems that brought them to the appointment, including walking around the home, inspecting areas that they consider suspicious for structural integrity, and climbing ladders when needed. Free estimates do not include this additional work and careful scrutiny.

     As opposed to a free estimate performed by one of our non-CSL carpenters, these inspections are aimed to prevent potentially slapping a quick fix on top of problems that could result in long-term damage. This in-depth look from the beginning of the job with a CSL carpenter, though incurring a small fee, may save clients from situations like unseen wet, rotted wood that could lead to insect infestations later on. And, if unforeseen carpentry problems are combined with other aspects of the house like paint, customers could paint their entire home’s exterior only to find that the paint will not stick – creating a much greater cost in the long run for both painting and carpentry.

     In order to save our customers both time and money when reviewing more extensive and/or complicated carpentry work, Tom Curren Companies stands behind our carpentry inspection and its flat fee over free estimates in order to get the full scope of the work from the very start of your project.

The post Carpentry Inspections: An Investment Instead of an Estimate appeared first on Tom Curren Companies.

]]>
Peeling Paint from Sills and Frames https://www.tomcurrencompanies.com/blog/peeling-paint-from-windows/ Mon, 05 Nov 2018 21:11:18 +0000 https://www.tomcurrencompanies.com/?p=2325     Windows are close to the weather, and—that being so—they take a lot of abuse from the elements. More often than not, peeling paint from […]

The post Peeling Paint from Sills and Frames appeared first on Tom Curren Companies.

]]>
    Windows are close to the weather, and—that being so—they take a lot of abuse from the elements. More often than not, peeling paint from wooden windowsills and frames can be sourced back to moisture. When snow melts on your sills, when rain stands along them, water eventually seeps into the paint film. Later, it evaporates. But it evaporates under the paint film, which causes loss of adhesion and peeling. Another common culprit is poorly sealed, improperly caulked framing, or else caulking that has itself cracked or peeled, allowing water to compromise the paint.

    To repair peeling wooden sills and frames, start by removing as much of the damaged coat as possible, sanding or scraping down to the bare wood. If more power is needed to remove the damaged paint, you can also make use of a chemical stripper or a heat gun—but be careful. When using either of them, make sure to follow all the manufacturer’s instructions, and keep in mind that both methods can damage unprotected glass and sealants.

    Once you’re left with the bare wood, use a damp rag to clean any dust or debris off the surface. Then let any residual moisture evaporate. This part is important: let it dry thoroughly. Caulk wherever you notice damage to the old sealant, especially at 90-degree angles and in the nooks and crannies that let in moisture. After that, apply a good primer to the surface and repaint. Especially when working on the exterior of the window, consider using an oil-based gloss paint to protect any surface that’s exposed to snow or rain. Replacing your old windows with storm windows and using dehumidifiers can also help prevent peeling from striking your window sills and frames again.

     So to cap things off, remember: windows—being constantly exposed to sun and water—are bound to present challenges to homeowners. But by properly stripping cracked and peeling paint, resealing where necessary, and repainting after careful prep work, you can fix the problem now. If done properly, your work will be much longer-lasting. And that’s that! No more peeling window sills and frames.

The post Peeling Paint from Sills and Frames appeared first on Tom Curren Companies.

]]>
Mold and Mildew https://www.tomcurrencompanies.com/blog/mold-and-mildew/ Mon, 05 Nov 2018 21:04:18 +0000 https://www.tomcurrencompanies.com/?p=2321      The health risks of mold and mildew in the home are severe enough that both the Centers for Disease Control (the CDC) and the […]

The post Mold and Mildew appeared first on Tom Curren Companies.

]]>
     The health risks of mold and mildew in the home are severe enough that both the Centers for Disease Control (the CDC) and the U.S. Environmental Protection Agency (the EPA) devote entire sections of their websites to both public education and the safe removal of these hazards. The EPA even includes, among its materials, the rather delightfully-titled “Interactive Mold House Tour,” which encourages you to “protect your home from mold by touring the Mold House,” and takes you, room-by-room, through common mold issues and methods of addressing them.

     The terms mold and mildew are often used interchangeably, and—sure—they are very similar. Both are fungi, both crop up in moist conditions, and both words have been handed down to us, linguistically-speaking, from Middle English. The main difference between them is visual: that is, mold looks almost like growths of fur, while mildew manifests as more of a thin, whitish coating on surfaces.

     Mold and mildew appear wherever excessive moisture is found. Both fungi grow on wood, on ceiling tiles, on wallpaper, paint, insulation, drywall, carpeting, and just about everywhere else (the only major exception being metal). And, besides being unsightly, mold and mildew pose significant health risks to homeowners. Particularly with respect to respiratory infections and ailments, mold and mildew present a real risk to you and your family. According to the CDC, “the Institute of Medicine found there was sufficient evidence to link indoor exposure to mold with upper respiratory tract symptoms, cough, and wheeze in otherwise healthy people.” And, depending on the type of mold and your sensitivity to it, the ramifications could be much greater.

     Mold and mildew aren’t just troubling when it comes to your health—they also present threats to the integrity of your home. If mold or mildew is a problem in your home, the EPA writes that “you must clean up the mold and eliminate sources of moisture,” whether that’s by fixing leaks, reducing indoor humidity through greater ventilation, or replacing absorbent materials like ceiling tiles and carpets. If mold or mildew is present on your walls, that may require more labor-intensive work— removing paint or drywall, say, and then re-coating or resurfacing.

     If you have any questions about mold or mildew removal, or if you’re looking for professional guidance, look no further. We’re here to help, and we’re happy to answer your questions any time.

The post Mold and Mildew appeared first on Tom Curren Companies.

]]>
Mildew in Bathrooms https://www.tomcurrencompanies.com/blog/mildew-in-bathrooms/ Mon, 05 Nov 2018 21:00:11 +0000 https://www.tomcurrencompanies.com/?p=2319      Humidity brings mildew: that’s practically unavoidable. And it’s a particular problem in high traffic areas exposed regularly to water, condensation, and steam—like bathrooms. The […]

The post Mildew in Bathrooms appeared first on Tom Curren Companies.

]]>
     Humidity brings mildew: that’s practically unavoidable. And it’s a particular problem in high traffic areas exposed regularly to water, condensation, and steam—like bathrooms. The Federal Emergency Management Agency (FEMA) has a helpful primer that describes what mildew is and why it spreads so fast:

     “Mildew and molds are fungi—simple microscopic organisms that thrive anywhere there is a moist environment,” the FEMA report states. “Mold growths, or colonies, can start to grow on a damp surface within 24 to 48 hours. They reproduce by spores—tiny, lightweight ‘seeds’—that travel through the air. Molds digest organic material, eventually destroying the material they grow on, and then spread to destroy adjacent organic material. In addition to the damage molds can cause in your home, they can also cause mild to severe health problems.”

     So how do we minimize mildew in bathrooms, or stop it entirely?

     Well, you have a couple of remedies at your disposal. One smart way to stop mildew before it begins is simple: use a strong fan, leave it on for a half hour, and let it cut the moisture from the air. That way, your bathroom should be sufficiently dry and inhospitable to spore growth. That’s really the main idea here: if your bathroom is humid, there’s a high likelihood that mildew will develop.

     Another strong choice is to paint your bathroom with mildew-resistant finishes, like Benjamin Moore Aura Bath and Spa, which is formulated specifically to resist humid conditions. This is an especially good option if you already have a mildew problem and need to repaint anyway. You can tell if that’s the case by examining your walls and ceilings and asking yourself: Is the paint peeling? Is there mildew on or under it? If the answer to either question is yes, you should start by removing the mildew with a water-bleach mixture, scraping off any loose paint, and sanding it all down. Then you can apply your primer and mildew-resistant paint—but first: make sure the mildew has been totally eviscerated. Remember that even a few spots can multiply quickly; it’s worth the extra effort to avoid unchecked proliferation down the road.

The post Mildew in Bathrooms appeared first on Tom Curren Companies.

]]>
Pros and Cons of HGTV https://www.tomcurrencompanies.com/blog/pros-and-cons-of-hgtv/ Mon, 05 Nov 2018 20:55:48 +0000 https://www.tomcurrencompanies.com/?p=2317     HGTV is a cable channel, the programming of which almost exclusively revolves around how-to and home makeover shows. In the “pro” column, HGTV can […]

The post Pros and Cons of HGTV appeared first on Tom Curren Companies.

]]>
    HGTV is a cable channel, the programming of which almost exclusively revolves around how-to and home makeover shows. In the “pro” column, HGTV can help viewers on an imaginative level. That is, it may show viewers how to reimagine a space; it may give you new ideas; and it might give you a sense of what kind of improvements add value to a home (even if the value is often overstated on TV). All the same, it’s important to keep in mind that successful TV shows thrive on narrative and storylines, and much of what you’re seeing has been extensively finessed by professional writers and producers.

    In 2010, The New York Times characterized HGTV as “a cable network that fed—and feasted on—the fantasies and delusions of the housing bubble.” That’s partly because the budgets and time constraints on their programs are, to put it bluntly, wildly unrealistic, giving homeowners a misleading impression of the renovation process. Their shows also tend to gloss over important issues like permits and lead times for special order items. Last year, BuzzFeed wrote about the “40 Facts You Probably Didn’t Know About HGTV,” the most interesting of which are probably #10 (Love It or List It is among Hilary Clinton’s favorite TV shows) and #23 (furniture isn’t part of the homeowner’s stated budget, meaning the rooms you’re seeing on TV are elaborately staged to increase visual appeal). More to the point, the cameras only show what producers want them to show. That means that anything that isn’t finished or improperly finished just doesn’t end up on TV. What’s more, contractors on television are paid to meet doomsday clock deadlines, working hours that would be impossible to follow in real life, the seconds literally ticking down as they finish the job for the cameras.

    Tim Reagan, assistant editor of Remodeling, quotes one of HGTV’s own stars, Mike Holmes, on the quality of most of the network’s shows: “I watch many different shows and go, ‘Wrong, wrong, wrong’…Pros watch and go, ‘Oh my god, this guy has no idea what he’s doing.'” Reagan also recounts Holmes’ original pitch for his TV show Holmes on Homes. Reportedly, Holmes met with HGTV executives and told them: “I can clearly see they’re doing it wrong on television. I’m surprised you haven’t been sued.”

     So, in short, keep in mind that HGTV is a TV network at its core, one that (like any other network) uses the magic of production to sweep a lot of real life complications and exigencies under the rug. The cost of remodeling varies greatly by state, where you live in a state, and what you’re hoping to get done, so—if you’re in the greater Boston area—give us a call, and our estimators will get to work.

The post Pros and Cons of HGTV appeared first on Tom Curren Companies.

]]>
Excessive Paint Chalking On Interior Walls: Causes & Solutions https://www.tomcurrencompanies.com/blog/excessive-chalking/ Mon, 05 Nov 2018 20:48:26 +0000 https://www.tomcurrencompanies.com/?p=2313 Excessive chalking is a common issue that looks precisely as you might imagine: a powdery, dust-like layer that lays over the surface of your paint. In […]

The post Excessive Paint Chalking On Interior Walls: Causes & Solutions appeared first on Tom Curren Companies.

]]>
Excessive chalking is a common issue that looks precisely as you might imagine: a powdery, dust-like layer that lays over the surface of your paint. In fact, if you type “excessive paint chalking” into a Google Image search, you’ll find photo after photo of hands that seem to have wiped down a blackboard without an eraser.

What causes interior paint chalking?

Flat paints, white paints, and light-colored paints are at the greatest risk for excessive chalking. According to the U.S. Government’s Official Guidelines for Preserving Historic Homes, excessive chalking is generally attributable to either “the gradual disintegration of the resin in the paint film,” or to paint that “contains too much pigment for the amount of binder (as the old white lead carbonate/oil paints often did.)” Another common cause is overexposure to UV light—i.e. damage from the sun—which decays the bonds between the molecules in the paint film. There are, however, a few other possible diagnoses: over-thinned paint, old paint, low-quality paint, an unprimed surface, extended exposure to moisture, or bad initial prep, plain and simple.

Excessive chalking can quickly lead to streaking, lightening, and, eventually, the wholesale erosion of your coating’s film. In short, it’s something you’ll want to take care of to avoid further damage. But how to go about correcting it?

How to fix paint chalking on interior walls?

First off, you’ll want to buy a topcoat with strong UV resistance. While even the best paints may chalk a little, a quality finish will resist both cracking and the kind of excessive chalking that leads, over time, to more serious repairs. Before repainting, you should always make sure to prepare the surface properly. In this case, that means removing all chalk residues from the surface, and time to let the surface dry. Do a quick test with a finger to see if any powder still remains, and—if so—repeat the cleaning process. Then you’re ready to repaint over the dry, clean surface.

The post Excessive Paint Chalking On Interior Walls: Causes & Solutions appeared first on Tom Curren Companies.

]]>
Peeling Under Eaves https://www.tomcurrencompanies.com/blog/peeling-under-eaves/ Mon, 05 Nov 2018 20:39:20 +0000 https://www.tomcurrencompanies.com/?p=2311     Generally, the elements have a deleterious relationship to exteriors, causing wear and damage that can end in costly repairs. Exposure to weather does, however, […]

The post Peeling Under Eaves appeared first on Tom Curren Companies.

]]>
    Generally, the elements have a deleterious relationship to exteriors, causing wear and damage that can end in costly repairs. Exposure to weather does, however, have one very positive effect: cleaning your surfaces naturally. The few exterior elements of your home that never benefit from that cleaning effect are the shaded spaces under your eaves, where dirt, grime, pollution, and—most importantly—sulfur dioxide accumulates.

     You can’t get away from sulfur dioxide: it’s in the air. And what sulfur dioxide does that you need to know about is this: it leaves tiny, salt-like crystals on exterior surfaces. Those crystals are, unfortunately, rather problematic—particularly when they’ve been lingering under your eaves for a long time. If you’re looking for a reason why the paint in those protected, shady places are peeling, a good first suspect is improper surface preparation. If those salt deposits from the air weren’t removed prior to coating, it’s no surprise that your paint has started to peel.

    To take a short, science-based detour: your paint peels because the crystals draw moisture through the top coat, roughly the same way salt draws moisture into a piece of poultry. When that happens with chicken, you have a succulent bird; when it happens with paint, you get peeling and blistering—unlike poultry, paint should never be moist under the surface. So what do you do if the damage is already done? How do you deal with paint peeling under your eaves?

    A good solution is perhaps an obvious one, but we’ll say it anyway: repaint. But before doing that, you need to remember a few things to ensure a strong, long-lasting finish.

   First, clean the area you’re looking to repaint and let it dry. Second, scrape off any peeling paint and sand the surface down to the substrate, making sure to wipe it down and ensure that no dust from the sanding will get under your finish. Finally, before repainting, use a high-quality primer. Then apply your topcoat.

    Once your paint job is finished, just keep in mind that nothing is naturally cleaning the space under your eaves. If you want to maintain your smooth new topcoat, occasionally spray it down with a hose, and remember that those protected parts of your exteriors need, if anything, a little extra attention from time to time.

The post Peeling Under Eaves appeared first on Tom Curren Companies.

]]>